
Misskeyの検索機能を使用するための設定方法を説明します。
もしあなたがXSNSを利用している場合は、ここまで飛ばしてください。
もしあなたがXSNS以外のホスティングサービスを利用している場合は、各ホスティングサービスにお問い合わせください。
目次
providerの設定
Misskey 2025.5.0では、検索にSQL、PGroonga、meilisearchの3つを使用することができます。これらは.config/default.ymlのfulltextSearchを変更することで設定できます。
以下に、それぞれの検索エンジンのメリット・デメリットを示しておきます。
| 検索 | メリット | デメリット |
|---|---|---|
| SQL | 何も設定しなくても使える | 遅い 精度は微妙 |
| PGroonga | 高速 ANDやOR検索が使えるなど機能が豊富 | PostgreSQLの拡張機能をインストールする必要がある データ量が増えてくるとメモリ使用量が大きくなる |
| meilisearch | かなり高速 一応 -wordのように除外検索はできる | PGroongaに比べると機能面で劣る ディスクI/Oが多く、サーバーのパフォーマンスに影響を与える |
fulltextSearchの設定は以下のようになります。
fulltextSearch:
  # You can select the ID generation method.
  # - sqlLike (default)
  #   Use SQL-like search.
  #   This is a standard feature of PostgreSQL, so no special extensions are required.
  # - sqlPgroonga
  #   Use pgroonga.
  #   You need to install pgroonga and configure it as a PostgreSQL extension.
  #   In addition to the above, you need to create a pgroonga index on the text column of the note table.
  #   see: https://pgroonga.github.io/tutorial/
  # - meilisearch
  #   Use Meilisearch.
  #   You need to install Meilisearch and configure.
  provider: sqlLike
もしPGroongaを使用する場合は、以下のように設定します。
PGroongaを使用する場合は、PostgreSQLの拡張機能としてPGroongaをインストールする必要があります。
fulltextSearch:
  # You can select the ID generation method.
  # - sqlLike (default)
  #   Use SQL-like search.
  #   This is a standard feature of PostgreSQL, so no special extensions are required.
  # - sqlPgroonga
  #   Use pgroonga.
  #   You need to install pgroonga and configure it as a PostgreSQL extension.
  #   In addition to the above, you need to create a pgroonga index on the text column of the note table.
  #   see: https://pgroonga.github.io/tutorial/
  # - meilisearch
  #   Use Meilisearch.
  #   You need to install Meilisearch and configure.
  provider: sqlPgroonga
meilisearchを使用する場合は、以下のように設定します。
fulltextSearch:
  # You can select the ID generation method.
  # - sqlLike (default)
  #   Use SQL-like search.
  #   This is a standard feature of PostgreSQL, so no special extensions are required.
  # - sqlPgroonga
  #   Use pgroonga.
  #   You need to install pgroonga and configure it as a PostgreSQL extension.
  #   In addition to the above, you need to create a pgroonga index on the text column of the note table.
  #   see: https://pgroonga.github.io/tutorial/
  # - meilisearch
  #   Use Meilisearch.
  #   You need to install Meilisearch and configure.
  provider: meilisearch
PGroongaのセットアップ
PGroongaを使用する場合は、PostgreSQLの拡張機能としてPGroongaをインストールする必要があります。
私はPGroongaを使用したことがないので、詳細はこちらの記事を確認してください。
meilisearchのセットアップ
meilisearchを使用するには、以下の条件を満たす必要があります。
- meilisearch 1.3.4以上がインストールされていること
- meilisearchのAPIキーが設定されていること
- Misskey側でmeilisearchの設定がされていること
meilisearchのインストール
Docker Composeの場合
以下をcompose.ymlに書き加えてください。
    meilisearch:
        restart: always
        image: getmeili/meilisearch:v1.14.0
        environment:
            - MEILI_NO_ANALYTICS=true
            - MEILI_ENV=production
            - MEILI_MAX_INDEXING_THREADS=2
            - MEILI_MAX_INDEXING_MEMORY=1GiB
        env_file:
            - .config/meilisearch.env
        networks:
            - internal_network
        volumes:
- ./meili_data:/data.msCAUTIONサーバーで実際に使える量より以下の環境変数の値を大きくすると、サーバーが落ちる可能性があります。
MEILI_MAX_INDEXING_MEMORYは、meilisearchが使用する最大メモリ量を指定します。設定しない場合、meilisearchは最大でシステムの3分の2のメモリを使用します。MEILI_MAX_INDEXING_THREADSは、meilisearchが使用する最大スレッド数を指定します。設定しない場合、meilisearchは最大でシステムのCPUスレッド数の半分を使用します。
これらはサーバーの性能に応じて変更してください。
他の環境変数はこちらを参照してください。
次に、.config/meilisearch.envを作成します。YOUR_MASTER_KEY_VALUEの部分は、openssl rand -hex 32で生成してください。
touch .config/meilisearch.envnano .config/meilisearch.envMEILI_MASTER_KEY=YOUR_MASTER_KEY_VALUE終わったら、以下のコマンドでコンテナを再起動します。
docker compose restartsystemdの場合
WARNING最新のドキュメントを常に確認してください: https://www.meilisearch.com/docs/learn/self_hosted/getting_started_with_self_hosted_meilisearch
/usr/binディレクトリに移動します。
sudo cd /usr/bin/以下のコマンドを実行してmeilisearchのバイナリを落とします。
sudo curl -L https://install.meilisearch.com | shconfigもダウンロードします。
sudo curl https://raw.githubusercontent.com/meilisearch/meilisearch/latest/config.toml > /var/lib/meilisearch/config.toml次に、config.tomlを編集します。
sudo nano /var/lib/meilisearch/config.toml以下のように編集します。master_keyの値はopenssl rand -hex 32で生成してください。
もしmeilisearchをMisskeyと違うサーバーで動かす場合は、localhostの部分を変更してください。
# This file shows the default configuration of Meilisearch.
# All variables are defined here: https://www.meilisearch.com/docs/learn/configuration/instance_options#environment-variables

# Designates the location where database files will be created and retrieved.
# https://www.meilisearch.com/docs/learn/configuration/instance_options#database-path
db_path = "./data.ms"

# Configures the instance's environment. Value must be either `production` or `development`.
# https://www.meilisearch.com/docs/learn/configuration/instance_options#environment
env = "production"

# The address on which the HTTP server will listen.
http_addr = "localhost:7700"

# Sets the instance's master key, automatically protecting all routes except GET /health.
# https://www.meilisearch.com/docs/learn/configuration/instance_options#master-key
master_key = "YOUR_MASTER_KEY_VALUE"

# Deactivates Meilisearch's built-in telemetry when provided.
# Meilisearch automatically collects data from all instances that do not opt out using this flag.
# All gathered data is used solely for the purpose of improving Meilisearch, and can be deleted at any time.
# https://www.meilisearch.com/docs/learn/configuration/instance_options#disable-analytics
no_analytics = true

# Sets the maximum size of accepted payloads.
# https://www.meilisearch.com/docs/learn/configuration/instance_options#payload-limit-size
http_payload_size_limit = "100 MB"

# Defines how much detail should be present in Meilisearch's logs.
# Meilisearch currently supports six log levels, listed in order of increasing verbosity:  `OFF`, `ERROR`, `WARN`, `INFO`, `DEBUG`, `TRACE`
# https://www.meilisearch.com/docs/learn/configuration/instance_options#log-level
log_level = "INFO"

# Sets the maximum amount of RAM Meilisearch can use when indexing.
# https://www.meilisearch.com/docs/learn/configuration/instance_options#max-indexing-memory
max_indexing_memory = "1 GiB"

# Sets the maximum number of threads Meilisearch can use during indexing.
# https://www.meilisearch.com/docs/learn/configuration/instance_options#max-indexing-threads
max_indexing_threads = 2

#############
### DUMPS ###
#############

# Sets the directory where Meilisearch will create dump files.
# https://www.meilisearch.com/docs/learn/configuration/instance_options#dump-directory
dump_dir = "dumps/"

# Imports the dump file located at the specified path. Path must point to a .dump file.
# https://www.meilisearch.com/docs/learn/configuration/instance_options#import-dump
# import_dump = "./path/to/my/file.dump"

# Prevents Meilisearch from throwing an error when `import_dump` does not point to a valid dump file.
# https://www.meilisearch.com/docs/learn/configuration/instance_options#ignore-missing-dump
ignore_missing_dump = false

# Prevents a Meilisearch instance with an existing database from throwing an error when using `import_dump`.
# https://www.meilisearch.com/docs/learn/configuration/instance_options#ignore-dump-if-db-exists
ignore_dump_if_db_exists = false


#################
### SNAPSHOTS ###
#################

# Enables scheduled snapshots when true, disable when false (the default).
# If the value is given as an integer, then enables the scheduled snapshot with the passed value as the interval
# between each snapshot, in seconds.
# https://www.meilisearch.com/docs/learn/configuration/instance_options#schedule-snapshot-creation
schedule_snapshot = false

# Sets the directory where Meilisearch will store snapshots.
# https://www.meilisearch.com/docs/learn/configuration/instance_options#snapshot-destination
snapshot_dir = "snapshots/"

# Launches Meilisearch after importing a previously-generated snapshot at the given filepath.
# https://www.meilisearch.com/docs/learn/configuration/instance_options#import-snapshot
# import_snapshot = "./path/to/my/snapshot"

# Prevents a Meilisearch instance from throwing an error when `import_snapshot` does not point to a valid snapshot file.
# https://www.meilisearch.com/docs/learn/configuration/instance_options#ignore-missing-snapshot
ignore_missing_snapshot = false

# Prevents a Meilisearch instance with an existing database from throwing an error when using `import_snapshot`.
# https://www.meilisearch.com/docs/learn/configuration/instance_options#ignore-snapshot-if-db-exists
ignore_snapshot_if_db_exists = false


###########
### SSL ###
###########

# Enables client authentication in the specified path.
# https://www.meilisearch.com/docs/learn/configuration/instance_options#ssl-authentication-path
# ssl_auth_path = "./path/to/root"

# Sets the server's SSL certificates.
# https://www.meilisearch.com/docs/learn/configuration/instance_options#ssl-certificates-path
# ssl_cert_path = "./path/to/certfile"

# Sets the server's SSL key files.
# https://www.meilisearch.com/docs/learn/configuration/instance_options#ssl-key-path
# ssl_key_path = "./path/to/private-key"

# Sets the server's OCSP file.
# https://www.meilisearch.com/docs/learn/configuration/instance_options#ssl-ocsp-path
# ssl_ocsp_path = "./path/to/ocsp-file"

# Makes SSL authentication mandatory.
# https://www.meilisearch.com/docs/learn/configuration/instance_options#ssl-require-auth
ssl_require_auth = false

# Activates SSL session resumption.
# https://www.meilisearch.com/docs/learn/configuration/instance_options#ssl-resumption
ssl_resumption = false

# Activates SSL tickets.
# https://www.meilisearch.com/docs/learn/configuration/instance_options#ssl-tickets
ssl_tickets = false

#############################
### Experimental features ###
#############################

# Experimental metrics feature. For more information, see: <https://github.com/meilisearch/meilisearch/discussions/3518>
# Enables the Prometheus metrics on the `GET /metrics` endpoint.
experimental_enable_metrics = false

# Experimental RAM reduction during indexing, do not use in production, see: <https://github.com/meilisearch/product/discussions/652>
experimental_reduce_indexing_memory_usage = false

# Experimentally reduces the maximum number of tasks that will be processed at once, see: <https://github.com/orgs/meilisearch/discussions/713>
# experimental_max_number_of_batched_tasks = 100
次に、systemdのUnitファイルを作成します。
sudo touch /etc/systemd/system/meilisearch.service[Unit]
Description=Meilisearch
After=systemd-user-sessions.service
[Service]
Type=simple
Environment="MEILI_CONFIG_FILE_PATH=/var/lib/meilisearch/config.toml"
ExecStart=/usr/bin/meilisearch
Restart=always
[Install]
WantedBy=multi-user.target次に、systemdからmeilisearchを起動します。
sudo systemctl enable meilisearchsudo systemctl daemon-reloadsudo systemctl start meilisearch以下を実行してactiveならOK。
sudo systemctl status meilisearchMisskey側の設定
次に、Misskeyの設定を行います。
nano .config/default.ymlmeilisearchのセクションをコメントアウトし、以下のように変更します。
meilisearch:
    host: meilisearch
    port: 7700
    apiKey: 'MEILI_MASTER_KEYと同じ値'
    ssl: false
    index: '何か好きなインデックス名、サーバーのURLなどがおすすめ'
scope: local # local or global, or arrayhostには、meilisearchを動かしているサーバーのホスト名を指定します。Docker Composeを使用している場合はmeilisearchを、systemdでMisskeyと同じサーバーで動かしている場合にはlocalhostを指定してください。portには、meilisearchのポート番号を指定します。デフォルトは7700です。Docker Composeの場合、この値は7700から変更しないでいいです。apiKeyには、meilisearchのマスターキーとして指定したものと同じ値を指定します。sslは、meilisearchに接続する際にSSLを使用する場合にはtrueを指定してください。そうでない場合はfalseを指定してください。indexは、meilisearchのインデックス名を指定します。特に決まりはありませんが、サーバーのURLやホスト名などを指定することをおすすめします。scopeは、Misskeyがmeilisearchにどの範囲をインデックスするかを指定します。localは、あなたのMisskeyサーバーの投稿のみをインデックスします。globalは、あなたのMisskeyサーバーと連合しているすべてのサーバーの投稿をインデックスします。[example.com, esurio1673.net]のように配列として持たせることもできます。この場合、あなたのMisskeyサーバーと、配列で指定したサーバーの投稿をインデックスします。
meilisearchのインデックスに存在しない投稿は検索の対象になりません。
また、meilisearchを使用すると公開範囲がフォロワー、ダイレクトである投稿はインデックスされず、検索の対象外になります。
超重要: ロールを設定する
Misskeyのクライアントから検索をするには、ロールで検索を許可する必要があります。
「コントロールパネル > ロール」を開き、ベースロールあるいは検索を許可したいロールを選択します。
「ノート検索の利用」を許可にして保存し、「もっと! > キャッシュをクリア」からキャッシュをクリアします。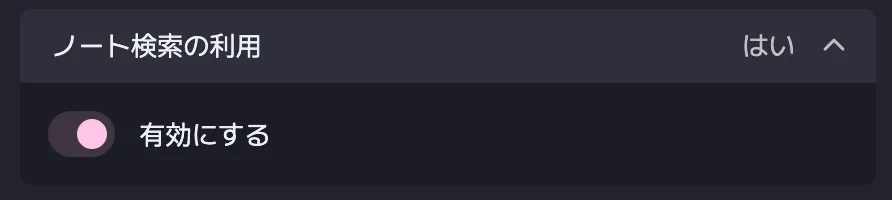 これで検索が使えるようになります。
というか、これをしないと検索は利用ができません。
おまけ
notectlで過去の投稿をmeilisearchにインデックスを貼る
Misskeyでmeilisearchを使用する場合、自動で過去の投稿はインデックスされません。
そのため、何らかのスクリプトで過去の投稿にmeilisearchのインデックスを貼る必要があります。
手前味噌ですが、notectlにはmeilisearchのインデックスを貼る機能があります。
notectlを使用して、過去の投稿にmeilisearchのインデックスを貼る方法を説明します。
notectlのインストール
こちらのドキュメントを確認してください。
インデックスを貼る
notectlをインストールしたら、以下のコマンドをMisskeyのディレクトリで実行します。
notectl search deploy -c .config/default.ymlこれで過去の投稿にmeilisearchのインデックスを貼ることができます。